Oy. Tumblr.@echojar, I started answering your ask about what I’m using for bird photography, saved…
Oy. Tumblr.
@echojar, I started answering your ask about what I’m using for bird photography, saved it as a draft, and now Tumblr has seen fit to send it… somewhere. Not sure where. Anyway, it’s gone.
So this is your response, unfortunately no longer including your actual ask. After a cut to spare non-mobile users b/c tl;dr.
Back in September 2018 I bought a camera to use for birdwatching. It was a Panasonic Lumix DC-FZ80 (link is to Amazon, which is where I bought it). It looks like this:
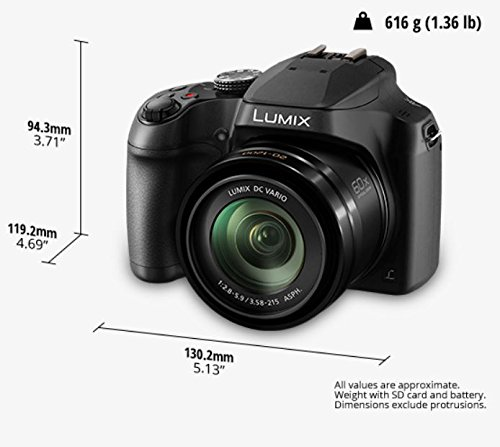
It’s a “bridge” camera, in the sense that it’s meant to fill the market niche between camera phones (which have mostly replaced compact digital cameras) and high-end DSLRs with detachable lenses, which take better pictures but are also much more expensive.
The FZ80 cost just under $300. I also bought a faster, larger-capacity memory card ($14), and an extra battery with an external charger ($24). I’m very happy with all of them.
The FZ80 has a good reputation among birdwatchers; I’ve run into several other local obsessives who use one. Among bridge cameras it’s optimized for telephoto work, with a zoom lens that goes to the equivalent of about 60X and image stabilization that does a decent job of keeping things steady even though I’m taking pictures handheld.
These days when I go birdwatching I always bring binoculars, phone (for eBird and field guide apps), and the camera. It’s light enough that I don’t mind bringing it along all the time. I usually keep it in a fanny pack, but when I’m in-progress on picture-taking I’ll hang it from my neck and lace it through the right side of the binoculars’ shoulder harness, such that the camera ends up hanging next to the binoculars but (mostly) doesn’t bump into them, and I can raise either one as needed. It looks super goofy, but I crossed that bridge a while ago and these days I just tell myself to try not to think about it.
I carry the spotting scope and tripod less frequently now that I have the camera. The camera isn’t a complete replacement for the spotting scope; the hierarchy of how well I can see details on a distant bird probably goes like this, from low to high:
- naked eye
- camera, zoomed, looking through the viewfinder (I almost never take pictures looking at the camera’s larger LCD screen)
- binoculars
- camera, zoomed, reviewing a photo on the LCD screen after taking it
- looking through the spotting scope
- camera, zoomed, looking at the photo on my computer screen at home
But the spotting scope with tripod is a lot heavier and more cumbersome. I don’t mind carrying it so much, but I really dislike the extra lag time it adds when I see a bird and want to look at it through binoculars, but I can’t get on the bird quickly because I have to set the spotting scope down first. So these days I bring the spotting scope for things like wetlands, sea watches, or stationary hawk watches, but otherwise I leave it at home. If I see a distant bird that’s too small to identify in the binoculars I can take a quick photo and check it out on the back of the camera.
(Oh, and I also bring the spotting scope when I’m docenting or leading a bird walk, because I can point the scope at a bird and let people take turns looking through it.)
But back to the camera. I’m not very experienced (at all) at photography, so there’s been a steep learning curve. I’ve ended up with the following approaches that I use most of the time:
If I’m shooting in poor light, or trying to get as pretty a shot as I can, or just generally futzing around I’ll usually shoot in “P” (Program) mode where the camera picks the shutter speed and ISO setting.
If I’m trying to shoot birds in flight (like at a hawk watch), or just generally when I’m being more serious, I’ll switch to S (”Shutter Speed”) mode and set the speed to to around 1/800, or sometimes faster, because I find that I have better odds of getting a sharp, identifiable image if I crank up the speed, even though that tends to give me higher ISO settings and correspondingly noisier/grainier images.
There’s been a lot of trial and error involved. For example, in the first week I had the camera I took this photo of a Blackpoll Warbler (PJH represent):
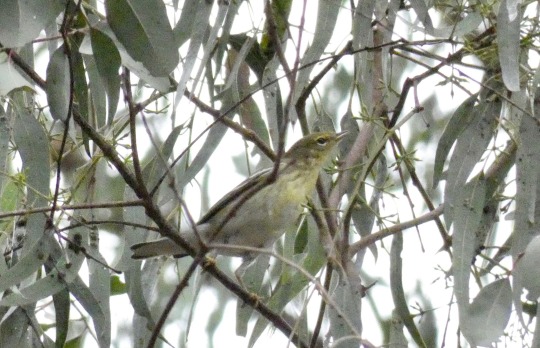
I shot that in S mode with the speed set to 1/500, because I figured that’s what I’d need to do to freeze the motion of a fast-moving warbler. Helpful birder and experienced photographer Dika, though, pointed out to me that in the early-morning light I was shooting in, that caused the camera to crank the ISO up to 3200, resulting in a grainy image. If I’d just shot in P mode I would have had a slower shutter speed, but it turns out that probably would have been fine for freezing motion and I would have benefited from the lower ISO setting.
In good light (e.g., a sunny day with the sun behind me and the bird well-illuminated) that’s pretty much all I worry about. But usually the light is poor, or the bird is backlit or in shadow, or something else is making things difficult. If I were just taking pretty pictures I’d write those situations off. But since I’m more interested in documenting what I’m seeing I’ll often try to make those situations work by setting the f-stop up or down to get the exposure on the bird as good as I can. Again, a lot of trial and error. I can’t imagine what it was like to try to do this back in the day when each shot wasn’t essentially free and you couldn’t see the result right away.
Oh: speaking of: I almost always shoot in “burst” mode, where I hold the shutter button down and just go snap-snap-snap-snap-snap as fast as the camera can write to the card. Later I throw away 99% of the shots for the few where the bird is looking the right way and the light is glinting on its eyeball just right and all that. With the 32G replacement memory card I bought I can store several thousand pictures; there’s only been a few times when I’ve been out so long that I’ve needed to take a break to purge rejects to make more room.
And focus. More than any other technical aspect of getting the shot, I worry about focus. Especially in the early days I had a lot of otherwise-decent shots that were fuzzy. Grr.
For birds in foliage or on the ground I use the autofocus mode where the AF sensor is just a tiny little box in the center of the screen, then do my best to keep that dot on the bird’s eye. Or, if the bird is big and/or close such that it fills a lot of the frame and I want to actually compose the shot as I’m shooting it rather than later while cropping, I’ll use the separate button on the camera back that lets me set and lock the focus while I’ve got the little AF spot on the bird’s eye, then hold the focus while I pan to whatever I want the actual shot to look like before shooting.
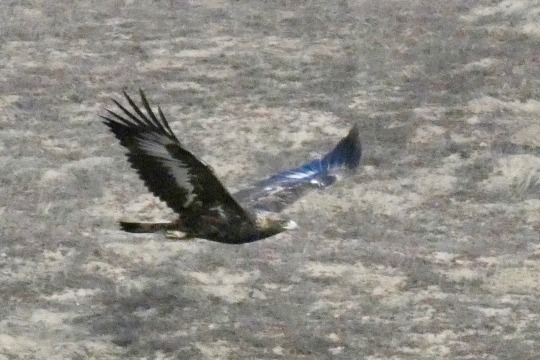
For birds in flight, like at a hawk watch, I can’t keep that little AF spot on the bird, so I switch to the mode where the AF area is a big diamond shape that takes up about half the field of view. When I see the bird in the air I’ll usually go first to binoculars to try to ID it, and then switch to the camera. I’ll point the lens in the general direction of the bird with just a moderate amount of zoom, then gradually zoom in trying to pick out the bird in the viewfinder as I magnify. Hopefully I eventually pick up the bird, then do my best to keep the bird centered, or at least in the frame somewhere, as I crank up the zoom all the way and start shooting. In the early days I’d practice on anything (clouds, airplanes, crows, red-tails); now I’ve got the technique down to where I can save it for when I see something I really want to get a shot of.
One technique that’s definitely helped is learning to adjust the camera controls without looking. When I’ve only got a second or two to try to get an identifiable shot I really don’t want to have to look at the camera.
My usual workflow when I get home is to sit down with the camera in my lap and go through the whole set, punching the button to mark the good ones as “Favorites”. Then I delete all except for those favorites and transfer them to my computer. After that I wipe the rest of the photos from the camera, swap out the battery and put the depleted one in the charger, and I’m ready to take more photos.
On the computer I’ll go through the photos and pick the best one of each bird (or multiple photos for a tricky ID or a rarity), and upload them to eBird. It’s been super-helpful for learning; there’s nothing like posting a misidentified bird to eBird with an accompanying photo to get a lesson not only on birds, but also on cognitive bias and hubris.
I take fewer shots these days than I did when I first got the camera, but I still take a lot.

Whew. Nothing like a brain dump of something I’ve been obsessing about to generate a shocking amount of verbal spew.
Reposted from http://lies.tumblr.com/post/183146925461.
Tags: birds, photography, echojar.
